
yallsop
ICT in Practice Presents: Games in Education! Shall we play or should we ban?

Minecraft in Education- Google Hangout
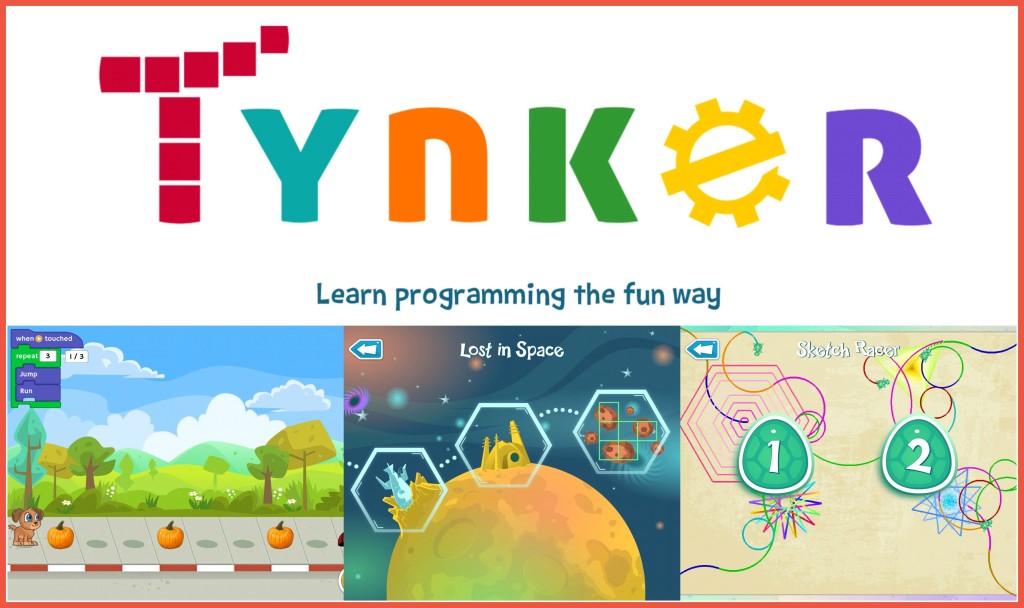
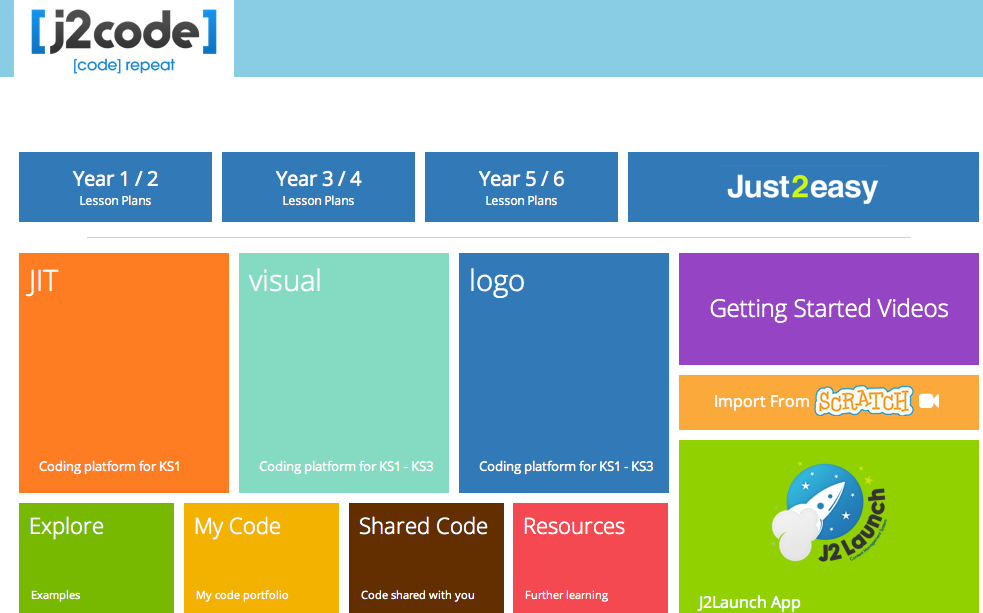
A BIG LIST of apps, programs and websites for teaching coding and game design


Scratch and Sniff by Ian Stephenson

As a university lecturer in a computer related subject I as invited last year to run a CPD workshop for computing teachers from local schools, introducing them to some technologies that they might use on STEM projects. I hope they learnt something from the sessions, but what I learnt from them was that they were very excited, but also apprehensive about the new computing curriculum.
There seemed to be a pretty good consensus that at KS2 the go-to tool was Scratch. Both teachers and pupils loved it and were keen to show off any number of fun projects they’d produced. They loved the immediate feedback, and being able to build programs from simple blocks.
However this relaxed confidence disappeared abruptly somewhere around KS3. At this point there was a vague notion that they should move on from Scratch to something more serious, but there was no clear plan as to what that might be. There were mumblings that Raspberry Pi was supposed to help, but no real idea what it was good for. Python seemed to emerge as a grudging consensus, but not with any enthusiasm – rather that people had heard that other people were using it and they probably should be.
Both staff and children appear to be getting lost in the transition from Scratch to “real” programming. To address this we need to consider why and when we transition from Scratch, and subsequently why children who were happy and enthusiastic working with Scratch fail to successfully transition to (for example) Python.
Why Stop Using Scratch?
The first question “Why stop using Scratch?” is actually quite tricky. Why isn’t Scratch suitable for KS3, KS4 and beyond? The obvious answers: “Because its just for beginners”, or “its not powerful enough”, are quite simply wrong. While its true that Scratch has limitations, most seriously with respect to data structures, children in KS3 are almost certainly not scratching the surface (sorry!) of what it can do. It’s possible to implement many degree level algorithms in Scratch. In fact Scratch’s model of parallelism is far in advance of most other common programming languages.
It may be that Scratch’s worst enemy is it’s logo – the same cat that made programming friendly in KS2 looks childish to the cynical minds of KS3. Scratch simply looks like a KS2 program. It would be interesting to compare how older children would approach a version of Scratch with more age-appropriate art work.
However artwork alone isn’t enough to keep Scratch viable for more experienced users, regardless of age. The real reason to move on from Scratch is that graphical programming is tedious. Like a menu in a restaurant it provides helpful suggestions as to what you might choose, but if you already know what you’d like, then looking for it in the list of available meals is tedious. New Scratch users can browse the tools palettes until they see something they think might help, but experienced programmers become frustrated looking for the block they’ve already decided they need.
Why Not Python?
At a certain point programmers become sufficiently experienced that they’re ready to write code rather than choose it. So why might they fail to transition to Python? It would be easy to pick on Python here, and note that it has a number of problems. It also doesn’t help that Python has attracts the type of programmers who love to show off all its quirks and features. All the strange features you can do that Python advocates love are best kept away from children. (If you Google “python hello world” the current top result is a post asking why the exact code recommended in the second search result doesn’t work.)
However the real problem isn’t Python’s fault. The real issue is that any mainstream programming language would be big leap. We’re asking novice programmers to go from “choosing from the menu” to “invent your own meal”. While they should be ready to do that (if not stick with Scratch), they’ve been training to “pick their own Pizza toppings”, and suddenly they find themselves in an Indian Restaurant. Not only are they asked to create a meal by themselves, but the whole meal structure is completely different to what they’ve seen before. Scratch programmers ready to move on from choosing to writing are ready to write Scratch. It’s a big leap to go from choosing in Scratch to writing in Python.
Writing Scratch
If Scratch is more powerful than we give it credit for, and the only obstacle to writing more complex programs in Scratch is the graphical programming paradigm, then the obvious next question was “what is it like to write Scratch?”. What would Scratch look like if you took the blocks and GUI away, and just kept the bare, text based language? The short answer is surprisingly powerful and nice to work with!
I implemented a compiler which would handle text files containing almost exactly the same words found on the Scratch blocks. The new programming language “Sniff” implements all of the blocks from Scratch 1.4, with the exception of those relating to sprites, as these of course don’t exist without the GUI. The only significant change is that variables are now declared as being either numbers or strings (or lists of number/string) as this allows the code to run efficiently and effectively on low powered machines.
Programs like the above are essentially identical in Scratch and Sniff, which means pupils bring their Scratch experience with them, and can immediately start creating in Sniff. In fact the transition can happen gradually, and at the students own pace. Long before Sniff is formally introduced teachers or children are likely write something similar to Sniff on the board, without suggesting its anything other than Scratch. It’s perfectly reasonable to support both languages in parallel: either moving stronger children to Sniff, while others retain the support of Scratch, or even allowing children to build code fragments in Scratch before typing them into Sniff.
Being Engaging in a Screen Based World
When I got my first computer the first program I wrote printed my name on the family TV set. Its impossible to overstate how big a thing that was. Televisions were the only screens we had, and TV was something that was sent to us by “the powers that be”. To have your name on television was totally subversive, and was in a very real way the first steps to the screen based environment we have today. While broadcast television is still important, developments from those first home computers (and first home computer users) have democratised our screens to the point they’re ubiquitous. Unfortunately this also means the appearance of a screen is no longer exciting in the way it was when home computers were new.
Sniff can be run on a desktop computer, but it most of the work is targeted at Raspberry Pi and Arduino. To flash an LED on an Arduino the Sniff code is:
make LED digital output 13
when start
.forever
..set LED to on
..wait 1 secs
..set LED to off
..wait 1 secs
which takes us effortlessly from the GUI based Scratch into physical computing. Being able to engage with the real world beyond the screen creates real opportunities to integrate computing into the wider curriculum, controlling robots, controlling stage lighting, displaying a heart beat logging weather, and measuring the speed of toy cars have all been implemented in Sniff with only a few lines of code, and provide a jumping off point to explore other issues. Writing code to “actually do things” rather than just display things on screen is perhaps the most important tool for promoting computing engagement.
Getting Involved
Sniff is free to download, and currently runs on Mac, Linux, and Raspberry Pi. Compiled programs can be run on the host platform, or on an Arduino board. While Arduino is ideal for physical computing, you can also use the Pi’s GPIO ports. Writing code to handle Pi boards such as the PiBrella, and 7Seg is often easier in Sniff than using the provided Python library.
I’m in the early stages of taking the system out into schools, so if you’d like to get involved, download an install the code from www.sniff.org.uk. There’s demo code there, including a bunch of physics experiments just waiting to be turned into lesson plans.
ABOUT THE AUTHOR

Ian Stephenson is a lecturer at the National Centre for Computer Graphics at Bournemouth University where he teaches computing within an art based framework. Through the University’s Centre for Excellence in Media Practice, and STEM outreach programs he is also lead developer on the Sniff, post-Scratch programming language.
Surviving and Thriving with Computing as an NQT

by Elliott Plumb
3 ways you can engage primary pupils in ‘Computing’ during your first year of teaching
Whether you are about to enter teaching or you have just finished your first year, there are always subjects that you feel you haven’t sunk your teeth into as much as you may have wanted (P.E. for me!). There may have been timetable clashes; a lack of resources or it may be a lack of confidence in the subject (Again, P.E. for me!). Computing can sometimes be that subject. 2014 will see huge changes for the Computing curriculum. ICT has evolved into ‘Computing’ and with the name change comes a huge shift in the content we are required to teach. Out go the PowerPoint presentations and spreadsheets and we welcome coding and algorithms. This article aims to provide three ways in which you can make the new Computing curriculum easier and more engaging for the children in your class.
Resource Awareness:
A fantastic aspect of teaching is the community you are immersed in. As an NQT most teachers are willing to help and assist you with your practice. The same goes for the borough you work in and any education centres that you may be fortunate enough to have in close proximity.
Before you begin sweating over all of the new technical vocabulary, go along and see your Computing co-ordinator. If there is not a co-ordinator, ask your phase leader. Some schools have a Computing suite and some have trolleys of iPads and laptops. Importantly, every school should have a range of technology that you could incorporate into your lessons. Flip Cams, Raspberry Pi’s and a whole host of useful programs could all be available in your school. Don’t forget to ask staff for successful Computing lessons they may have completed in the past. They may even offer you the planning they used. You don’t ask, you don’t get!
Looking beyond your school is also a great way of finding useful Computing resources. There are so many different (free) resources available to schools from your local borough. Some boroughs have centres with computer suites that can be used by local schools for free. This could be a brilliant opportunity if your school lacks the resources you might be looking for. Do your research and search wide for what free resources are available to you.
Lastly, Education Officers and Advisors that are spread across your borough can be a great help. These people come in many forms; some work at local museums, some are class teachers and some work at your local Civic Centre. Developing strong links with the local council can provide amazing opportunities. They often have a great vision and access to resources that you might not have thought existed!
Cross Curricular Planning
Another way in which you can flex your Computing muscles is to assure that you consider Computing in all aspects of your planning. Whatever the subject may be, ask yourself – Could I incorporate any computer skills here? From Literacy through to Geography, you could take your topic of choice and make links with the new Computing curriculum. Not only will the children enjoy it but it could also give them a chance to consolidate learning. Children could make a game using ‘Scratch’, they could build Lego robots or you could use iPads to make animations or films. The possibilities are endless.
Pupil Involvement
Finally, you must not underestimate the prior knowledge that the children of today have when it comes to technology and computers. Pupils have been an invaluable resource for previous projects as utilising their knowledge has benefitted everybody.
Ways in which you can involve children in the teaching of the subject can range according to how comfortable and confident you feel about your class and their knowledge and behaviour. Discussions as a class about their knowledge before you begin planning can be an extremely informative guide. Generating a discussion can draw out how much the children know already. This allows you to differentiate into ability groups and also differentiate the questioning in your planning.
Pupil-led computing sessions whereby particular children take the lead in groups and troubleshoot issues that may arise is worthwhile not only for the pupils, but for the teacher too. Being brave and letting the children guide the learning and the discussions can be hugely beneficial and more enjoyable for everybody.
2014 will see almighty changes across the Computing curriculum. Many schools are ready for this change and can offer fantastic opportunities and resources. If you are applying for a post or interested in taking on Computing in your current school, ask a plethora of questions about resources and where the school is going next with Computing. Computing is taking an extremely exciting new direction and rather that shying away, embrace it and let the children run with it!
CHILDREN, MOBILE TECHNOLOGY AND E-SAFETY

by Jamie Mortimer
Children and young people love our phones. I don’t mean landlines, a practically obsolete piece of technology that we all rent for a monthly fee just so we can then pay another monthly fee to get an internet connection. I’m talking about our mobile phones, and more specifically our smart phones. It’s not a surprise. From the moment our children are born they see us holding them, looking at them and talking to these little shiny boxes. The same applies to tablets. When we grew up we used to see our parents reading the paper, reading a book, using a telephone, writing letters and having a cup of tea with friends. Now we do all of these things on our phone or tablet.
My son is nearly 7 years old. One of the first phrases he uttered when he was little was, ‘oo tube’. He knows that Facebook is a website. He knows that people post messages on twitter. He knows that you need a wi–fi connection to get on the internet. He knows what the internet is. He knows that an iPhone, an iPod and an iPad all use an iTunes account. He knows what an account is and why you would give your personal information to create an account.
So when he was 6 he was given an iPodtouch and I’ve stuck to a few very simple rules when it comes to him using it. Let’s start with the device. Its setup using my iTunes account, which means I get the email invoices for all purchases once a week. So what did I lock down? I kept it straight forward. No Safari; that’s the internet browser, so he can’t get on to websites with his device.
A password is required to purchase apps; this includes free apps as you still have to technically ‘purchase’ the app. No Facetime or iMessage app; that means no video chatting or text messaging to anyone, and that’s it. He can then do pretty much anything else; I don’t need to block content based on age ratings or content as he can’t get access to it anyway. You’d be surprised how easy it is. You just go in to the settings and restrictions and you literally toggle the apps on/off.
We have just two rules. Firstly, I look after it and he has to ask when he would like to use it. The second and most important rule is that he only gets to use it downstairs. I’ll explain. I need to monitor what he’s doing on it and his behaviour or how he responds as he plays games or reads books. It’s my job to make sure I promote acceptable behaviour and make sure he isn’t accessing inappropriate content. When he gets older and I do grant him access to the internet I want us to have formed a relationship of open trust when it comes to discussing what he has read and viewed on the internet. Once he has access to the internet it’s going to be crucial that he isn’t using his device on his own in his bedroom. If he’s been allowed to use it like that before, he isn’t going to want to change his behaviour because ‘he’s always been allowed to do it that way and it isn’t fair’ and he’d kind of have a point. Here’s the warning shot across the bows though. We all know technology changes at an ever increasing pace and that’s where I was caught out very recently. His favourite game at the moment is Sonic Racing and it pops up that there is an update, so he updates it. He even tells me he’s got an update and he’s going to download it. Brilliant! Thanks for telling me; I’m really pleased you told me. Well the next day I can hear machine gun fire. Mobile gaming is shifting towards more free apps with ‘in-app’ purchases to enhance the game play. This means games allow you to purchase tokens to buy extra content and features, and to draw you in (and generate advertising revenues) they give you free tokens for watching adverts. These adverts typically promote other apps you might want to buy and download and there is always one for a game that requires you to blow the head off something or a zombie dripping in blood. It may only be 20 seconds but its 20 seconds you don’t want your 7 year old to be viewing, at least not for a few more years. He now knows he must not view the adverts and thankfully we are well on our way to developing a healthy respect towards technology together.
Community Learning and Skills Development delivers courses across Suffolk to complete beginners to gain confidence in using technology and the internet safely and also to support parents or carers with promoting safe use of technology to children and young people. To register your interest or enrol on a course in a centre near you contact us on 0300 456 2050 or at our website: www.clsd.org.uk.
Happy and responsible gaming!
Jamie Mortimer
uk.linkedin.com/in/geekylearner
@geekylearner
jamie.mortimer@realisefutures.org
WEB 2.0 TOOLS IN OUR COMENIUS PROJECT ‘CITIZEN OF CARE-LAND’

You are only limited by your creativity
I introduced some web 2.0 tools in education for our commenius project meeting in Estonia (March 24-29, 2014). The project was called ‘Citizen of Care-land’, 2013-2015. Teachers from 12 European coutries attended the conference, amongst them my school, Pujanke Elementary School. I decided to make a presentation and show it to the teachers in order to bring them closer to some of the web 2.0 tools. My main aim was that teachers returned back to their schools and disseminated their findings about web 2.0 to their pupils, as our project’s aim is to use ICT amongst teachers and pupils. We have our Twinspace (private area of our project) on the E-twinning platform, where we share all project activities. Teachers and pupils have their separate areas to communicate with each other, upload and share photos, videos etc. Our project is focused on pupils activities; pupils make presentations showing a certain activity and then present them at each project conference. I therefore first decided to show them how they could improve their presentations by using Prezi tools for creating presentations instead of the more traditional Power Point.
My presentation for that purpose was created in Prezi, and it was interesting that teachers could learn how to navigate with Prezi whilst they were watching at the presentation at the same time. All of the teachers were in front of the computers, listening to me and following the steps. First, I explained what Prezi is; that it is a new way of creating, collaborating, editing and sharing user-generated content online. Prezi allows you to design your own distinctive, eye-catcing presentations.
I also showed them that these presentations can be flowing; that they can arrange text and images in any way they like, they can also choose the order and amount in which each element will be zoomed into. I then explained the process for creating an account on Prezi.com (I suggested setting up a free account for the first time). Finally, I showed them how to create a presentation after creating an account simply by clicking on ‘New prezi‘ and using basic tools on a blank canvas (A place where you create your presentation). The teachers were fascinated with the fact that they become like artists in Prezi, where they decide about the appearance of their presentation. I showed them ‘a wheel’ that gives them easy access to all of the main tools where they simply clicked and dragged what they wanted. If they wanted to write something, they could just double-click anywhere to begin typing. It was very interesting when they realised that they could insert files (pdf, power point, video, photos..) into their Prezi. I also introduced them to very important tools in Prezi, to paths that allow them to create the order of their presentation after they have put all the text, videos, photos etc. Using paths, they began clicking on the element they wanted to zoom into first and they continue clicking on each object in the order that they wanted them to appear in their presentation. I highlighted that they can always edit everything. Finally, I showed them that they can edit, delete or download Prezi, and what is more important, share Prezi using ’embed code’ or copying the link. We shared our Prezis on the educational platfrom E-twinning, on Twinspace. In May, during our Project conference in Spain, pupils had the task to create presentions about ‘Women rights in Europe’, and the great surprise: – many presentations were created in Prezi. It was great!
The second tool that I wanted to introduce to them was Voki, a speaking avatar  that is a great tool for classroom activities and makes learning fun. I wanted teachers to incourage their pupils to communicate with pupils from different countries using Voki. Voki can easily be embedded on our Twinspace, so we decided to create virtual presentations with Voki tools. Voki is a very simple tool, on www.voki.com you create your username and login. When you enter, you decide upon the appearance of your Voki character (you can choose a character that is similar to you or not), and when you click ‘Customize your character’ you can change the colour of its eyes, clothes, even the colour of the skin etc. The most important is to give your Voki a voice, and you can select from a few options how to do it (recording with a microphone, uploading an audio file or the easiest option – you just type in your text). After you have typed the text, you can even choose the language and the voice and accent of your avatar. Sharing Prezi is also great (you can email your Voki, copy the link or embed the code).
Our pupils use Voki to communicate with each other about ceartain topics, they like it very much as they find Voki interesting and funny. Our teachers have made their own Vokis too and shared them on E-twinning to present themselves to other teachers. My final tool was Glogster – online interactive posters that allows you to combine text, pictures, graphics, video and audio into an interactive poster. I wanted to introduce this tool to teachers in the project, because in our project we have pupils visits other countries, not just the teachers.
 Pupils from one country host pupils from another country in their home. I found this tool great for introducing each other, making a poster of him/her, and he/she can write, draw, add videos and everything else that chracterises him or her. In this way, our pupils learned about each other, and made closer connections before their visit. They enhanced many skills using this tools-creativity, effective communication, student collaboration, literacy skills etc. It can be done in a short time, so our pupils used this tool .You simply register at Glogster edu, write some info about yourself and start playing by clicking and dragging text, image, graphics, video, sound etc, and share your Glogster on website or somewhere else. Our pupils shared their Glogsters on the Pupils’ area on Twinspace, and through email.
I encourage my colleagues all the time within my school, within the project and my pupils to use ICT as it is fun, creative, and pupils learn faster through games without realising that they are actually learning at the same time.
Gifs Re-Born by Tim Brook

Gifs and Me
Way back in the mists of Web 2.0, when YouTube was a glint in Google’s eye and Wikipedia was Encarta’s weedy rival, I built a website. I had neither the finances, nor the time, to buy and learn to use Flash. So, to give my site a bit of pizazz, I used a fair old sprinkling of downloaded Gifs. Not too many because they can be pretty distracting and, besides, in those ISDN days they slowed page loading to a speed that allowed you take a comfort break…
 When I came to build my new, improved site I had acquired Paintshop Pro which came with an applet called Animation Shop. Animation Shop lets you create or edit Gifs frame by frame or by adding effects and transitions to images. You can download it these days for free, and it’s still very useful, although the user interface betrays its age and it possibly won’t run on Windows 8. I’m still very fond of some of the Gifs I created with Animation Shop.
I thought little more about Gifs for some years, until I began to become aware of a re-birth through Tumblr sites I was visiting; but it was only when I chanced upon Zeega that I became really interested once more – enough to start making gifs again. Zeega allows you to acquire gifs through giphy and mix and match them with text, and Creative Commons licensed stills and music. Zeega’s main man Jesse Shapins (of luxuriant beard) gives an excellent starter tutorial here. I was particularly interested by the simple way multiple gifs and stills can be made transparent and layered allowing creative combinations. Completed zeegas can be embedded in sites and blogs.
The great advantage of the gif is that it is an image format not a video, which  means it can be added directly to a web page or included in a presentation without the need for video uploading to a host. Making gifs has certainly come on a bit. Complex and sophisticated work has given rise to the idea of gif as an art form My daughter’s phone made a gif from a series of pictures she took, without even asking her. There is currently a brief history of the gif on Zeega – all told with gifs, of course.
Making Gifts
Googling ‘making gifs online’ produced a swathe of sites, all offering free conversion and editing of online videos. The ones I tried worked pretty well, but when I got interested in making my own stuff again, I wondered if there was a free download for desktop use. Need I have wondered? Several arrived complete with irritating toolbars or apps which caused me to uninstall them immediately – and the junkware… (Note to self: do not download free apps when tired).
 Finally I came upon Instagiffer freeware, with a pleasantly functional interface and all the video-to-gif functionality I needed – and no ads or – erm – troubling – toolbars. It allows the clipping of online video or will convert your own videos. You can also capture gifs from any moving item on your screen. Clips can be edited from your chosen start-frame to end-frame or individual frames removed by double-clicking. Size and quality can be adjusted. Images can be cropped. There are even some special effects. The finished gif will save to a folder of your choice. The only thing I’ve found missing is the ability to identify the number of plays, but Animation Shop can do this with your finished gif if you wish and maybe to add a cross frame fade as well, to smooth the characteristic end-of-gif ‘jerk’.
After giffing about a bit with my own and online videos, I wondered about screen capturing video from other tools that will animate images, like Photo Story 3, for example, which creates a ‘Ken Burns’ video from stills. And then I tried screen capturing from Powerpoint.
If you have never tried Powerpoint’s object animation button for fear of having your presentations sneered at, now’s your chance to play. The custom animation sidebar allows a surprisingly large amount of flexibility including drawing paths for the objects to travel along, delays and multiple animations at the same time. Do choose the advanced timeline as you can drag the animations to the length you require. You will only need to screen capture the animation Play preview window (rather than the full screen) as it’s plenty big enough for a gif.
Finally it occurred to me that by inserting the gift you had just made, into a 
PowerPoint page, and adding a mask on top (a picture with a transparent hole in it) you could create shapes with animated insides. You can do this too with the Powerpoint animations themselves. To make a mask, remove the insides of a simple line image. This easily be can be done by using the ‘magic wand’ selection tool of any half-decent image editor (I use Paint.NET). Save it as a png. or gif, as JPEGs don’t do transparency. Bring it to the front of your stack of Powerpoint objects with the animation paying behind the ‘hole’. Using Instagiffer’s screen capture tool you can end up with a TV with moving images on the screen or a boat full of swimming fish. My current personal favourite is a lightbulb with a firework display inside i.e. lots of brilliant ideas!
Capture with Instagiffer and the surrounding blank page area can be cropped. I use white pages most often but you could colour your mask the same colour as your page. If you want a completely transparent surround for your gif the Online Image Editor (no signup) has a transparency wizard that will do this for you.
Two more gif must-haves
If you have never seen, or previously written off, the Pivot Animator freeware, download it now and start playing. Peter Bone, the deviser of Pivot has fairly recently produced the first non-beta version 4, which will animate objects (sprites) as well as stick figures. Pivot animations will now save as gifs or video. There’s a good support site too. Microsoft Research offers a free download of Cliplet which allows the creation of those animations with still backgrounds (known as cinemagraphs). It comes with free tutorials. Some fairly sophisticated animation can be achieved. In the classroom this could involve detailed planning and editing while using very short action clips which might take only a couple of minutes to capture saving groups wandering around with cameras for hours. The file sizes are relatively small as only part of the screen is animated, which means you can have pages full on your class blog…
Gifs in use
 There is something strangely compelling about the animated gif. Students love them. There are some truly beautiful gifs out there as well as a fair collection of the dull, obscene, sparkly or limp – pretty much like the rest of the web. They certainly add visual interest to your presentations. If, like me, you are a fan of Inanimate Alice you’ll have some great models for writing with animation.
I’m getting interested in the language of gifs. All stories need some form of punctuation: pauses, full stops or slow fades for example. The animated gif sits between a still image and video. It plays without the need for action on the viewer’s part.
Naturally movement is key but in a story perhaps they need to loop without over-obvious junctions to convey a sense of continuity. Perhaps, like all punctuation, it best signals a changeover. My Magic Lantern animations were headings which hinted at the page contents. A blazing fire could be the beginning or ending of a piece and used to symbolize leaving or arriving home; ripples on water: dissipation or a response to a whim…
Gifs can allow for close observational writing. Action clips could be used as scenes from the middle of a story, for which students can suggest, or write, beginnings and endings.
Simple, moving diagrams can be made by you or, even better, students collaborating, to demonstrate processes in Science, Technology and Geography and assembled on a shared Padlet wall. 
 Now, if all this has whetted your appetite but the techtalk has left you cold, you’ll perhaps be glad to know I’m in the middle of planning, writing and recording a free online course, DIY GIF , covering all this and more. It should be finished by the end of August. So keep your eye on my Digital Glue blog for regular updates on the progress of the work. You could be making some lovely autumnal gifs or maybe even moving scenery for your Christmas Production.
And have some very engaged learners…
Tim Brook
http://www.digitalglue.org/
More gifs


ICT GARAGE ACADEMY

The “God Particle” needed to transform a Download community into an Upload Community:
Bilisim Garaj Akademisi (IT Garage Academy) is an online portal supplying coding, web design, 3D design and robotic/electronic design curriculum for children from the ages 7-8, 9-12 and 13-16. On the portal, Turkish youths, starting from 7 years old, learn:
* coding using Scratch or MS Small Basic,
* web design using Notepad,
* 3D design using Sketchup
* robotic / electronic design using various safe electronic materials,
* and entrepreneurship through IT.
Why?
The slogan of the platform is “From a Download Society to an Upload Society.” This motto aims to attract Turkish people’s attention to an important problem. Turkey is one of the top countries using social media and mobile internet. For example, Turkish people are among the top Facebook users. On the other hand, Turkish people produce ICT technology much less than they consume. To illustrate, applications produced for mobile devices such as smart phones and tablet PCs have the market volume of 65 billion US$ around the world. Turkey’s contribution to this market volume is smaller than 0.5%! Another example is that Turkey’s annual ICT market volume is 36 billion US$. In this volume, high technology production including hardware, software or embedded technology is smaller than 1%. The volume of the ICT market in Turkey is formed by mostly communication technologies such as GSM operators and internet service suppliers.
 The youth is devoid of the skills required to produce with IT, because the education system doesn’t equip the new generations with the skills such as coding, web design or robotic design especially at primary and secondary levels. Gaining productive IT skills is postponed until university years. In the country, the general perception is that computer literacy is equal to computer use. However, computer use is a much broader concept covering computer literacy. In this information age, proper use of IT in education helps students to gain 21st century skills such as critical thinking, creative thinking, scientific thinking, collaboration with others especially in a problem based learning environment.
What?
To change this perception and increase the awareness of the concept of computational thinking, Dr. Selçuk Özdemir started the BilisimGarajAkademisi.com portal 18 months ago in Turkey. Now, more than 40 training centres and more than 10 primary/secondary private schools use his curriculum.
The curriculum used in BilisimGarajAkademisi.com has two dimensions. The first dimension (called Package 1) aims to present kids with their first threshold experience. With the modules in the Package 1, the kids realise that they can program computers, design web sites, 3d models and robots/electronic devices. In the first year in Package 1, the kids learn all of the four subjects separately. The priority in the first year is to show the kids who is the boss, because the students realise that they can tell computers what to do.

In the second year, the whole curriculum runs around an entrepreneurship problem. In Package 2, the students develop solutions for a given main and sub-problems using coding, web design, 3d design and robotic design and programming. The entrepreneurship problem helps students utilize all technologies to produce many related solutions for a real life problem. Utilising this holistic approach, in addition to advanced IT skills, the students have the opportunity to gain entrepreneurial competences defined by European Union. These entrepreneurial competences are classified as knowledge, skills and attitude. The students learn about “being initiative user”, “self-confidence”, “thinking on what new things can be developed”, “being optimistic”, “leadership”, “marketing”, “collaboration”, “the importance of being critical and creative”, “the concept of supply and demand”, “concept of cost-benefit” and “the importance of patents”.
Starting from this October, the students will gain more than 50 entrepreneurial competences whilst they develop a solution for the problem of energy. The students will be informed that energy resources come to an end and the world needs new and clean energy resources for especially transportation. In four modules of the Package 2, a student’s task is to:
* design a 3d model of an electric car which consumes solar energy (3D design module of the curriculum),
* calculate the cost of the production process of the solar energy car and protecting the confidential information (Coding module of the curriculum),
* produce and program a solar energy robotic car using real electronic circuit components (Robotic design module of the curriculum),
* promote and market the solar energy robotic car (Web design module of the curriculum).
How?
Bilişim Garaj Akademisi has a very simple and running methodology:
![]()

Curiosity is core to the Bilişim Garaj Akademisi curriculum. Edgar Morin emphasizes that without curiosity, learning doesn’t take place. In each module, the students are presented a concrete task to complete. The students create a new production in each hour of each module. Being able to create new things helps children to develop their self-esteem. Finally, children love demonstrating to others what they can perform or produce. In accordance with our motto “from a download society to an upload society”, the students can upload their own works to the “Project Gallery” module of the portal so that others can download and examine.
Finally:
Coding, in general producing with IT, is the “lingua franca” of the new age. In the future, all professions will need to do something which cannot be done by computerised machines. The new generations have to be equipped with productive IT skills before their university years. Thus, they will be aware what computers can do or cannot do. This awareness will help them to see the innovation opportunities in their professional field.
Bilişim Garaj Akademisi aims to be an international portal. The entire curriculum is being translated into English and the English content will be published via an English domain name.
Best regards,
Assoc.Prof.Dr. Selçuk Özdemir
The Founder of Bilişim Garaj Akademisi
selcukozdemir@gmail.com
@drselcukozdemir
Bilisimgarajakademisi.com
http://w3.gazi.edu.tr/~sozdemir/index_eng.htm


